
Ready to outfit your trailer with E-Track but don’t know where to start? This handy guide helps you choose an E-Track system in 3 easy steps:
Step 1: Choose A Rail
The E-Track rail is the base of the E-Track system. It installs in your trailer, truck, garage, shed or warehouse.
Here's what you'll need to consider:
- Orientation
- Length
- Finish
Orientation: Horizontal or Vertical

Horizontal E-Track

Vertical E-Track
The facts:
Horizontal E-Track is designed to be installed horizontally across trailer walls. It provides tie-down spots running the length of the trailer.
Vertical E-Track is designed to be installed vertically down trailer walls. It gives you a row of tie-down spots from floor to ceiling.
Horizontal E-Track provides more tie-down spots per foot (6 vs. 3) than vertical E-Track. Vertical E-Track is more narrow, and is often used to create structures that need to be raised and lowered.
The bottom line:
Horizontal E-Track is more commonly used, as it works well for most applications. Vertical E-Track is recommended for applications where a slimmer profile is needed, or when the E-Track is used to secure adjustable shelves, worktables, or beds.
Keep in mind:
E-Track installation is totally customizable, so feel free to create a custom layout that works for you. Use horizontal E-Track, vertical E-Track, or a combination of both types of rails.
Length: 2’, 4’, 5’, 8’, or 10’

Horizontal Lengths

Vertical Lengths
The facts:
Rails can be combined to create a custom length that fits your needs. Two rails laid end to end will connect seamlessly like one rail.
Rails can also be cut easily with a standard saw. Use E-Track end-protector caps to give the rails a finished look and to protect your cargo from unfinished ends.
The 10’ rail exceeds standard shipping size limits and ships via LTL (truck). Therefore, you would need a loading dock to receive shipment. Consider using a combination of shorter rails instead.
The bottom line:
Choose the longest length that fits your trailer and your application. If you need 10’ of E-Track, though, consider using a combination of shorter rails.
Keep in mind:
Don’t stress out too much choosing E-Track length. Shorter rails can easily be combined to create one long rail, and longer rails can be easily cut down to size.
E-Track also comes in singles, with just one slot, or doubles, with two slots, to fit the smallest spaces.
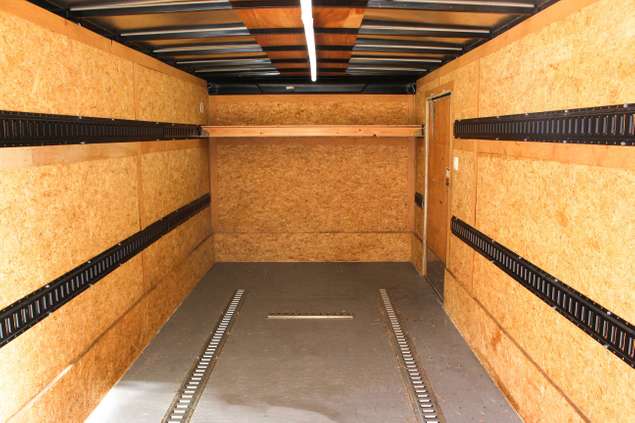
About Layouts
Can’t decide on a layout? If you’re setting up your trailer and don’t have a specific idea of what you plan to haul or store, you can use this popular E-Track layout. It will give you a tie-down spot wherever you need one.
Install two strips of horizontal E-Track along the entire length of the trailer wall at an installation height of 2 and 4 feet, and two strips along the entire length of the trailer floor, at least 36” inches apart.
Here’s how it looks:

Or, you can install just one strip along the entire length of the wall at 3 feet.
Whatever you decide, remember that the beauty of E-Track is that you can easily add rails as your needs change.
Finish: Powder-Coated or Galvanized

Powder-Coated

Galvanized
The facts:
Powder-coated rails have a sleek finish that will resist chipping, scratching, and corrosion. However, they are not as durable as galvanized rails, which will stay rust-free for many years.
Initial cost of galvanized rails is higher. However, they tend to result in lower long-term maintenance costs and need to be replaced less often.
The bottom line:
Powder-coated rails are long lasting and super durable, and they work well for most enclosed applications. Galvanized rails are recommended for trailer beds, or for any application where the rails are constantly subjected to the elements or to corrosive environments.
Step 2: Choose a Fastener
Once you’ve chosen your rails, you need to decide how to fasten the rails to your mounting surface.
Here are your fastener options:
- Fastening Type: Screws or Bolts

Screws
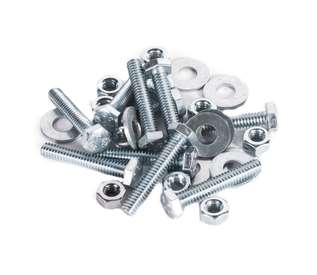
Bolts
The facts:
As long as you are hitting a sufficient number of studs, both will give your E-Track installation the maximum working load limit of 2,000 lbs.
Screws are the simplest installation method, but will not provide an adequate hold on very thin mounting surfaces or if studs are spaced far apart.
Bolts will give you the strongest hold, but require access to the underside of the mounting surface.
The Bottom Line:
Most people fasten their E-Track with screws, since they’re quick and convenient, and still provide an adequate hold.
Use bolts if you have access to the underside of the mounting surface and want the strongest possible hold. We also recommend bolts for thin or sparsely-studded mounting surfaces.
Keep in mind:
If you choose screws, you’ll need #12 or #14 screws. If you’re using bolts, use ¼” bolts.
Use self-tapping metal screws through the metal studs. Screws should be long enough to get a grip in the stud, but not too long to puncture the outer skin of the trailer. Check proper screw length by pulling out an existing manufacturer screw.
Depending on your mounting surface, use shorter wood or metal screws between the studs.
You’ll need two fasteners through each stud, and then 2 additional fasteners every 8”-10”.
If you’re installing vertical E-Track over a stud, use self tapping screws or bolts every 8”-10”.
Use backing plates to add strength to thin mounting surfaces or installations that are not hitting enough cross members.
Step 3: Choose Your E-Track Accessories
E-Track accessories complete your E-Track tie-down system. They click into the E-Track rails to keep your stuff secure and organized.
Here are your accessory options:
Accessory types: Hauling, Storage, and Shelving

Hauling

Organization and Storage

DIY Shelving
The facts:
E-Track is extremely versatile, so you can use it to haul cargo, organize your stuff, and build shelves and other DIY structures.
E-Track rails and accessories are all part of the universal E-Track system, so you can pair rails with accessories sold by any vendor.
The Bottom Line:
To haul cargo, choose from E-Track straps, O-rings, rope tie-offs, wheel chocks or shoring beams. For organization and storage, choose from an assortment of hooks, bags and baskets. To build shelves and DIY structures, choose from shelf brackets and wood beam sockets.
Keep in mind:
You can always add, move, or remove accessories as needed.


